|
Size: 17992
Comment:
|
← Revision 12 as of 2025-07-24 08:10:40 ⇥
Size: 17946
Comment:
|
| Deletions are marked like this. | Additions are marked like this. |
| Line 48: | Line 48: |
| * '''Subject01_electrodes_mm.tsv''': Position of electrode contacts identified with Brainstorm in [[https://neuroimage.usc.edu/brainstorm/CoordinateSystems#World_coordinates|world coordinates]], relative to the post-implantation CT volume. See [[https://neuroimage.usc.edu/brainstorm/Tutorials/SeizureFingerprinting#Electrode_labeling_and_contact_localization|Electrode labeling and contact localization]] for more details on this procedure. | * '''Subject01_electrodes_mm.tsv''': Position of electrode contacts identified with Brainstorm in [[https://neuroimage.usc.edu/brainstorm/CoordinateSystems#World_coordinates|world coordinates]], relative to the post-implantation CT volume. More details about it can be found in the next tutorial. |
| Line 145: | Line 145: |
| * All these options are also available after importing the file. Right-click on the second file > '''Register with default MRI'''. The reslice option previously presented corresponds to the menu "'''Reslice / world coordinates'''". The other reslicing options offer alternatives based on the MNI coordinates or the SCS coordinates, which are most of the time a lot less accurate. <<BR>><<BR>> {{attachment:coreg_popup.png}} | * All these options are also available after importing the file. Right-click on the second file > '''Register with default MRI'''. The reslice option previously presented corresponds to the menu "'''Reslice / world coordinates'''". The other reslicing options offer alternatives based on the MNI coordinates or the SCS coordinates, which are most of the time a lot less accurate. <<BR>><<BR>> {{attachment:coreg_popup.png||width="450"}} |
| Line 148: | Line 148: |
<<EmbedContent(http://neuroimage.usc.edu/bst/get_feedback.php?seeg/Introduction)>> |
Brainstorm's suite for stereo-electroencephalography (sEEG) analysis
Authors: Yash Shashank Vakilna, Chinmay Chinara, Johnson Hampson, Takfarinas Medani, Raymundo Cassani, John Mosher, Sylvain Baillet, Richard Leahy
TODO: Add flowchart
Contents
Introduction
This tutorial introduces concepts specific to managing intracranial stereoencephalography (SEEG recordings) within the Brainstorm environment. It guides users through computing time-frequency decomposition maps to identify the epileptogenic zone (EZ) using both ictal and interictal SEEG data. The tutorial is based on a clinical case from the McGovern Medical School at the University of Texas Health Science Center at Houston, Texas, USA.
Please note that this tutorial is intended for users already familiar with Brainstorm. It does not provide detailed explanations of the software's interface or theoretical foundations. For comprehensive introductory material, refer to the Brainstorm introduction tutorials.
License
This EEG, MRI, and CT data provided in this tutorial remain the property of the McGovern Medical School at the University of Texas Health Science Center at Houston. Use or distribution of this dataset outside the scope of the Brainstorm tutorials - including for research purposes - is strictly prohibited without prior written consent. For inquiries regarding permissions, please use the Brainstorm user forum.
Clinical description
The dataset featured in this tutorial was recorded at the Epilepsy Monitoring Unit (EMU) of UTHealth Houston. It pertains to a 25-year-old right-handed woman with drug-resistant epilepsy since the age of six. At 15, she underwent a right parietal opercular corticectomy. Despite this intervention, she continued to experience weekly focal aware seizures characterized by a left-hand tingling aura, as well as focal impaired awareness seizures presenting with staring and pouting.
During her EMU admission, intermittent right parietal slowing was observed, and ten habitual seizures were recorded, originating from the C4–P4 region. Magnetic resonance imaging (MRI) revealed bilateral perisylvian polymicrogyria (PMG), pachygyria, right posterior temporal periventricular nodular heterotopia, and post-surgical changes. Magnetoencephalography (MEG) localized discharges to the right superior parietal region adjacent to her previous resection.
SEEG implantation identified two distinct seizure onset patterns: 1) Low-voltage fast activity in the right superior parietal PMG during focal aware seizures; 2) Repetitive spiking in the posterior insular PMG during impaired awareness seizures.
Following a multidisciplinary evaluation, the patient underwent MR-guided laser interstitial thermal therapy (LITT) targeting the right superior parietal and posterior insular PMG. The procedure was uncomplicated, and she remained seizure-free at a one-year follow-up.
SEEG recordings
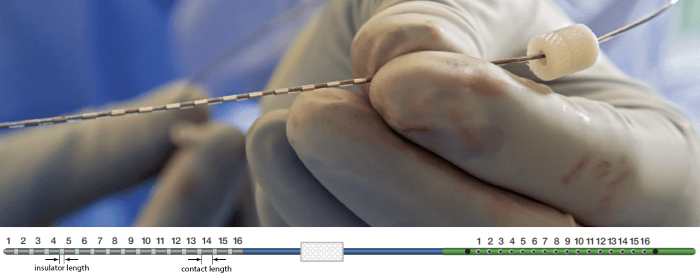
The recording electrodes used in this dataset are PMT SEEG Depth Electrodes, with the following specifications:
- Diameter: 0.8 mm
- Contact length: 2 mm
- Insulator length: 1.5 mm
- Distance between the center of two contacts: 3.5 mm
- Between 8 and 16 contacts on each electrode
Files
tutorial_seizure_fingerprinting/
anatomy/: Anatomy data
pre_T1.nii.gz: Raw pre-implantation T1 MRI (in NIfTI-1 format),
post_CT.nii.gz: Raw post-implantation CT (in NIfTI-1 format),
cat12: Folder containing precomputed CAT12 head tissue surfaces segmented from the MRI volume above. More details about the files can be found in MRI segmentation using CAT12.
recordings/: SEEG recordings
Baseline.edf: Raw SEEG baseline recording (in EDF format),
ictal_repetitive_spike.edf: Raw SEEG recordings (in EDF format) of a seizure with ictal repetitive spiking,
interictal_spike.edf: Raw SEEG recordings (in EDF format) of interictal spikes,
LVFA_and_wave.edf: Raw SEEG recordings (in EDF format) of seizure onset showing low-voltage fast activity.
Subject01_electrodes_mm.tsv: Position of electrode contacts identified with Brainstorm in world coordinates, relative to the post-implantation CT volume. More details about it can be found in the next tutorial.
References
Further details for this study can be found below:
Yash Shashank Vakilna, Deniz Atilgan, Johnson Hampson, Chinmay Chinara, Takfarinas Medani, Richard M. Leahy, Nuria Lacuey, Samden D. Lhatoo, Sandipan Pati, John C. Mosher, Jay R. Gavvala.
Time-Frequency Fingerprint Analysis in SEEG Source-Space to Identify the Epileptogenic Zone.
Annals of Clinical and Translational Neurology 2025.
Download and installation
Prerequisites:
Brainstorm Installation: Ensure you have a working copy of Brainstorm installed on your computer.
Familiarity with Brainstorm: This tutorial assumes that you have completed all the Brainstorm introduction tutorials and are comfortable with its interface and basic functionalities.
SPM12 (Statistical Parametric Mapping)
Purpose: SPM12 is required for:
- Coregistration between pre-implantation MRI and post-implantation CT volumes.
Utilizing tissue segmentation masks to remove extracranial regions from the CT.
Installation:
MATLAB Users: If you are running Brainstorm within MATLAB, install SPM12 either as a Brainstorm plugin or through a custom installation.
Standalone Brainstorm Users: If you are using the standalone compiled version of Brainstorm, SPM12 functionalities are included in the executable, and no additional installation is necessary.
OpenMEEG: To compute the forward head model the OpenMEEG Brainstorm plugin is required.
Download the dataset:
Go to the Brainstorm Download page
Download the file: tutorial_seizure_fingerprinting.zip.
- Unzip it into a folder that is not located in any Brainstorm directories (i.e., not in the Brainstorm program folder or database folder).
Brainstorm Setup:
- Start Brainstorm.
From the top menu, select: File > Create new protocol.
Name the new protocol: TutorialSeizureFingerprinting
Set the following options:
"No, use individual anatomy",
"No, use one channel file per acquisition run".
Import the anatomy
Pre-implantation MRI
In the Brainstorm database view, right-click on the TutorialSeizureFingerprinting folder → select New subject → name the subject: Subject01.
- Keep the default anatomy options defined when the protocol was created.
Switch to the Anatomy view (using the tab above the database explorer).
Right-click on the subject node (Subject01) → select Import MRI.
- Set the file format to: MRI: NIfTI-1 (*.nii;*.nii.gz)
- Select the file: tutorial_seizure_fingerprinting/anatomy/pre_T1.nii.gz
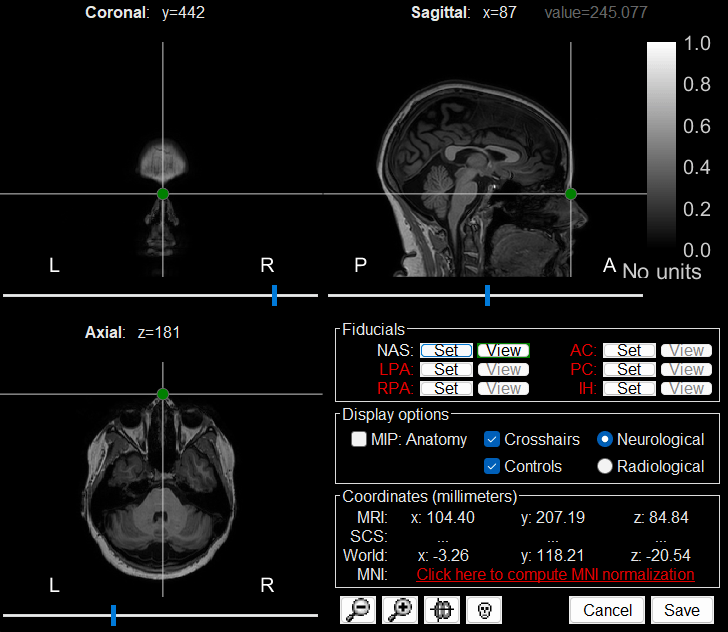
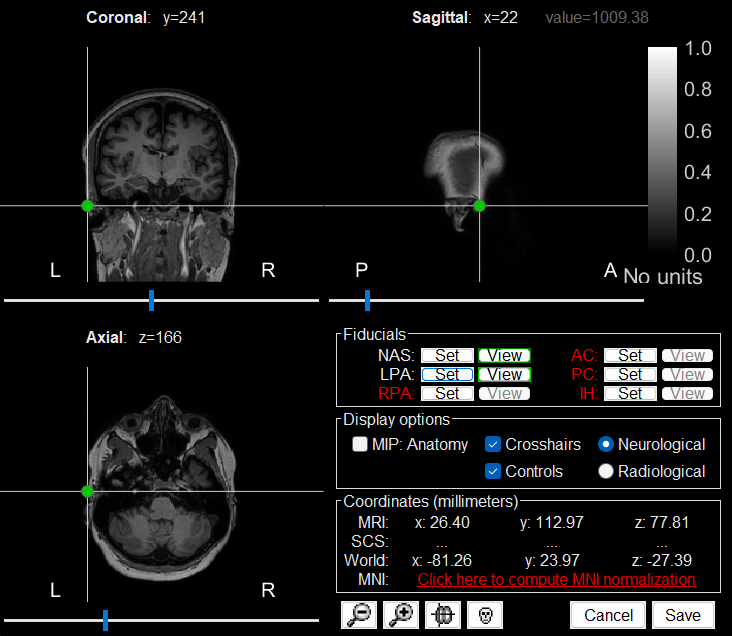
The MRI viewer loads with the MRI where we now need to set the required fiducial points - Nasion (NAS), Left Preauricular (LPA) and Right Preauricular (RPA) - that help define the Brainstorm's Subject Coordinate System (SCS).
For each point, click the
 , enter the MRI coordinates (provided below) and click Set button to set the point on the MRI.
 NAS: 104, 207, 85
LPA: 26, 113, 78
RPA: 176, 113, 78
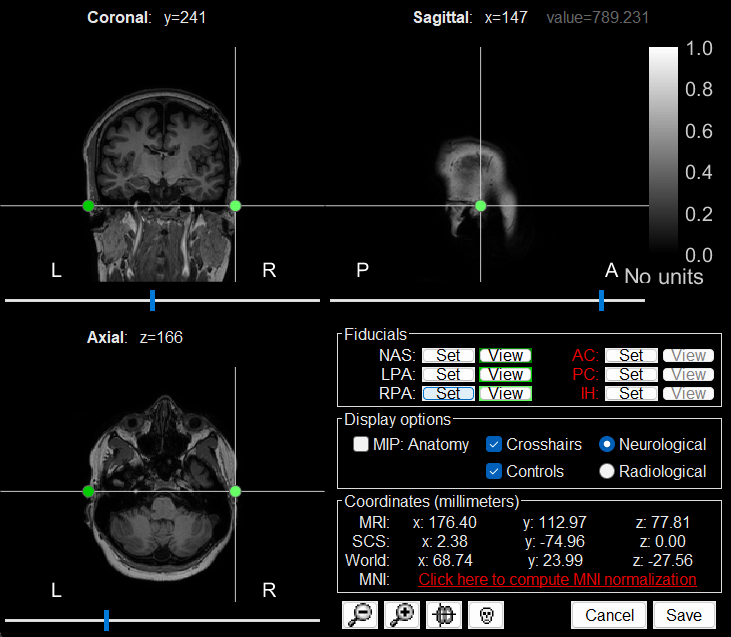
Click Save to close the MRI viewer.
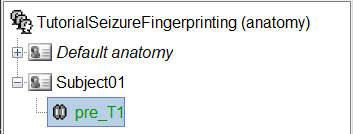
A new node named pre_T1 will be created under the subject in the database.
While this is not applicable to the current dataset, some NIfTI MRI files may include a transformation matrix in their header. In such cases, a pop-up window may appear asking: Do you want to apply the transformation to the MRI file? Selecting Yes will apply the transformation and reorient the MRI into Brainstorm's standard orientation, allowing you to view the coronal, sagittal, and axial planes correctly.
Generate default surfaces using CAT12
We recommend generating cortical surfaces with CAT12, especially if you are interested in a realistic representation of the patient's cortical folding in 3D. Follow the CAT12 tutorial to generate the surfaces as under.
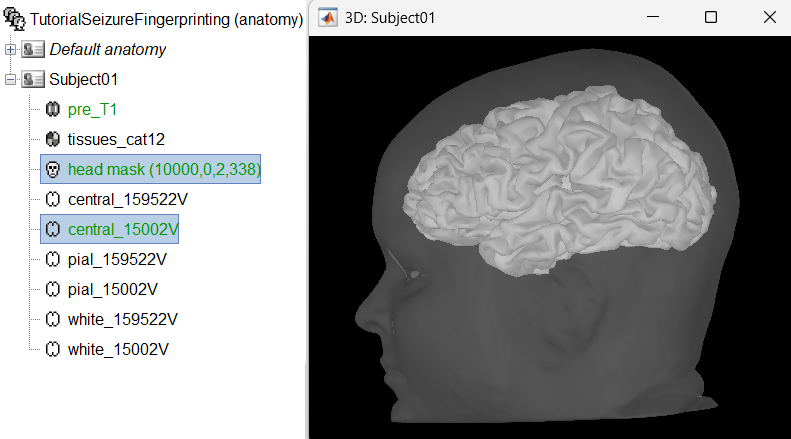
These surfaces will be used later, in the computation of the epileptogenicity maps. Read the section Importing realistic surfaces for information on how to use realistic surfaces from BrainVISA or FreeSurfer.
Segmentation using CAT12 can take around 1 hour depending on your system. To save time, we provide the precomputed CAT12 segmented surfaces generated using the MRI above as part of the tutorial dataset (tutorial_seizure_fingerprinting/cat12. To import them just right click on the Subject01 > Import anatomy folder (auto) and select the precomputed CAT12 folder above. More details can be found in the CAT12 tutorial.
Post-implantation CT
The pre-implantation MRI imported above will serve as the anatomical reference for this subject.
We will now import a second scan acquired after SEEG electrode implantation, in which the electrode contacts are visible. In this dataset, the post-implantation volume is a CT scan, where the SEEG contacts appear as bright (hypersignal) spots.
Right-click on the subject node (Subject01) → select Import CT.
- In the file selection dialog, choose: tutorial_seizure_fingerprinting/anatomy/post_CT.nii.gz
For coregistration, select the option: SPM
For more information about this procedure, see the Volume coregistration section
When prompted to reslice the CT volume, choose Yes. * This ensures that the CT volume is resampled to match the voxel dimensions of the MRI.

For skull stripping, again choose SPM. * This uses the SPM Tissue Segmentation algorithm to generate a binary mask that retains only the brain region in the CT volume, removing extracranial structures.
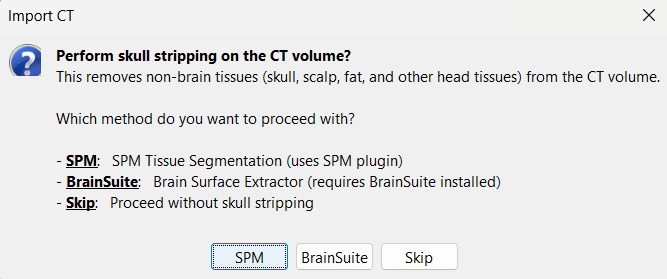
You can also perform skull stripping using BrainSuite's Brain Surface Extractor. Installation steps are detailed in the BrainSuite for Brainstorm tutorial.
The MRI viewer will open automatically, displaying the post-implantation CT volume as a colored overlay on top of the previously imported MRI. * Use the Surface tab, under the Data options section, to adjust the transparency and amplitude threshold of the CT layer.
You can also modify the colormap by right-clicking on the figure and selecting from the popup menu.
Use this interactive display to verify the accuracy of the coregistration:All anatomical structures—including scalp, skull, and brain—should align well between the CT and MRI volumes.
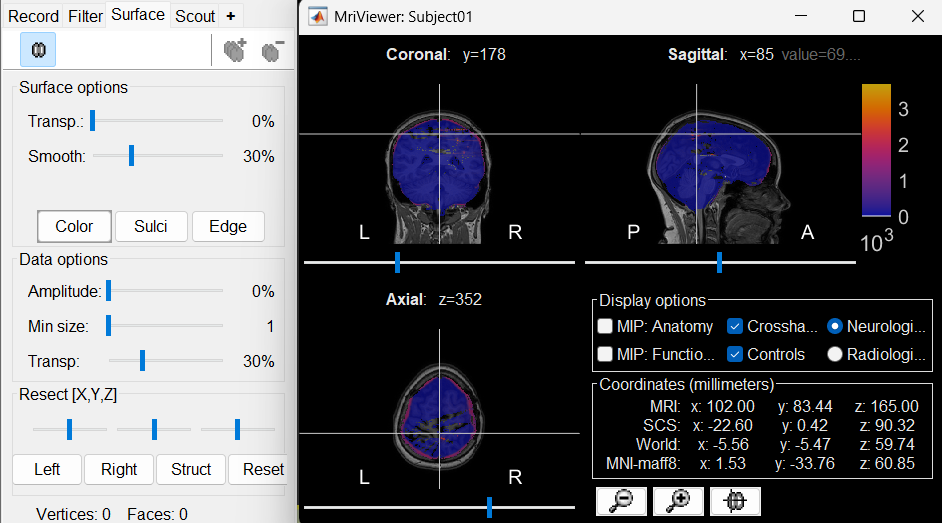
A new node named post_CT_spm_reslice_masked_spm is created in the database. The postfix _spm_reslice_masked_spm reflects the sequence of processing steps applied to the CT volume:
spm: Coregistration using SPM
reslice: Resampling to match the MRI voxel grid
masked_spm: Skull stripping using the SPM tissue segmentation mask
- To view the full processing history of this file:
Right-click on post_CT_spm_reslice_masked_spm → File > View file history

- To open and inspect the CT volume alone:
Right-click on post_CT_spm_reslice_masked_spm → Display > MRI Viewer
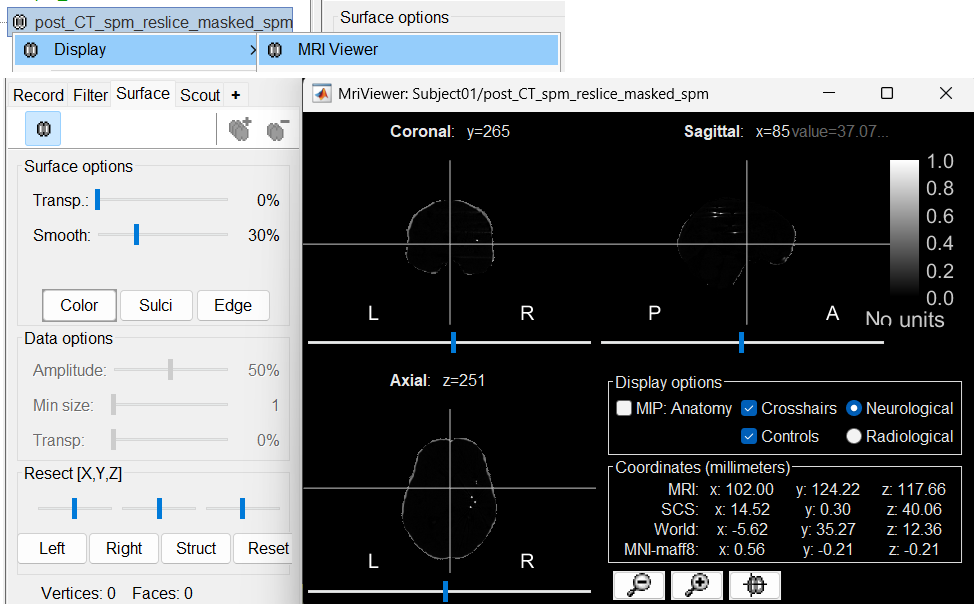
Volume coregistration
When importing two volumes successively in the subject anatomy, you need to coregister all the new volumes with the first volume imported, otherwise you wouldn't be able to do anything with them. The questions that are asked when importing a second volume are the following.
Transformation: This has nothing to do with the coregistration with the first volume, you also got this question when importing the first volume. If you answer Yes for the first volume, you should probably answer Yes here as well.
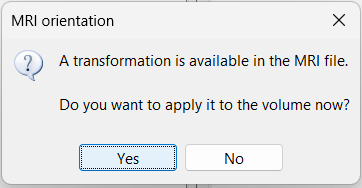
Registration: How to register the new volume with the previous one?
For MRI to MRI coregistration, the following menu can be seen.
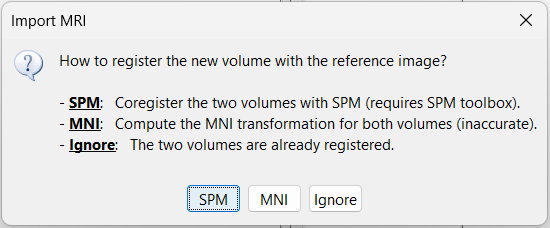
For CT to MRI coregistration, the following menu can be seen.
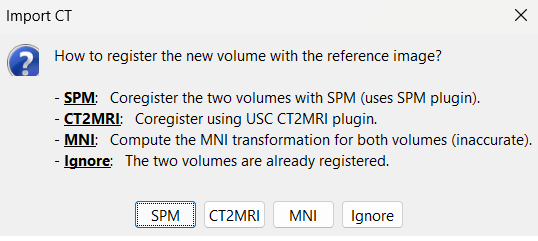
SPM: Uses the SPM toolbox to estimate the rigid transformation from the new volume to the reference volume (the first volume imported). It modifies the voxel=>world transformation in the second volume (vox2ras 4x4 matrix). If you skip this registration step, you can run it later by right-clicking on the second file > Register with default MRI > SPM: Register only.
CT2MRI: Uses ct2mrireg method which has been fine tuned to specifically perform CT to MRI coregistration. It is based on using Correlation Ratio as the cost function. To use this, you need to have it installed on your computer as a Brainstorm plugin. It can be found under the menu Plugins > Anatomy > ct2mrireg. If run from MATLAB, it requires having the Image Processing Toolbox.
MNI: Uses SPM code (embedded in Brainstorm) to estimate an affine transformation from each of the two volumes to the MNI normalized space. The transformation from the new volume to the reference is approximated with the two successive MNI transformations: (voxel_new=>MNI) => inv(voxel_ref=>MNI). This gives inaccurate results, and does not guarantee a rigid transformation (there might be slight scaling factor introduced). Do not use this option, unless you have no other option available.
Ignore: Considers that the two volumes are already coregistered. This option will keep the original voxel=>world transformations available in the .nii files, and assume they bring the two volumes in the same space.
Reslice: You have the option to rewrite the new volume so that it matches voxel by voxel the reference volume. If you know that the new file was already registered and resliced before you imported it in Brainstorm, answer No to this question. Otherwise, this option is necessary if you are expecting to overlay the two volumes in the MRI viewer. If you do not reslice the volume, you would still be able to edit the positions of the SEEG contacts on one or the other volume, but not to superimpose them to check they were registered correctly. This is a limitation of the MRI viewer that will be improved at some point.
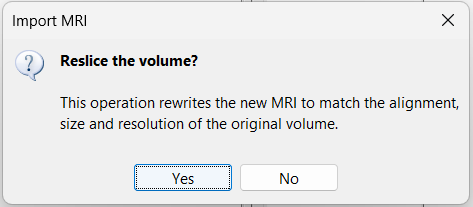
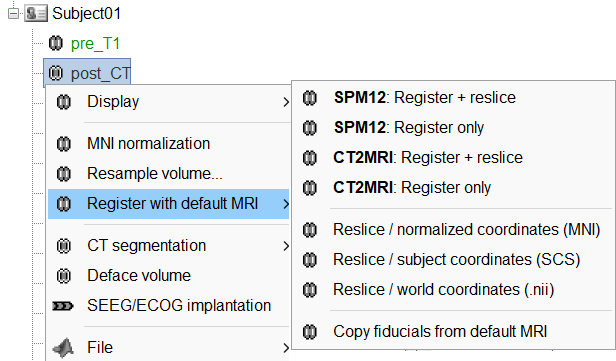
All these options are also available after importing the file. Right-click on the second file > Register with default MRI. The reslice option previously presented corresponds to the menu "Reslice / world coordinates". The other reslicing options offer alternatives based on the MNI coordinates or the SCS coordinates, which are most of the time a lot less accurate.
