Tutorial 18: Colormaps
Authors: Francois Tadel, Elizabeth Bock, Sylvain Baillet, Rana El Khoury Maroun
When displaying signals on the sensor array or on the cortex surface, we need to convert the amplitude of the signals into colors. The way the values are mapped to colors has a lot of influence on the visual interpretation of the figures. The selection of the appropriate colormap is an important step of the data exploration.
Contents
Colormap menus
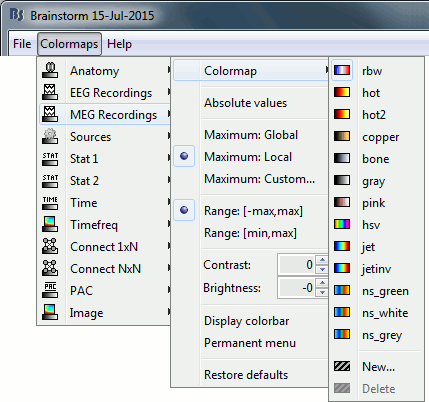
Brainstorm keeps track of many user-defined colormaps: anatomy, EEG, MEG, sources, stat, time, time-frequency, etc. You can go to the Colormaps menu in the main window to see this list.
Usually, you will use only popup menus from specific figures to edit the colormaps.
Open a topography view for the standard average (right-click > MEG > 2D Sensor cap).
Right-click on the figure, you will only see the menu "Colormap: MEG recordings".
- If you modify a colormap, the changes will be applied to all the figures, saved in your user preferences and available the next time you start Brainstorm.
Standard color arrays
A colormap is an array of colors that are indexed and then mapped to values. It is represented by a [Nx3] matrix, where N is the number of colors available in it. Each color is coded with three values corresponding its relative levels of red, green and blue. In Matlab, the colors are coded between 0 and 1. To get an example, type "jet" in the Matlab command window, you will get the default values for the "jet" colormap.
We offer two ways of creating this array of colors in Brainstorm: you can use standard color arrays (modulated in contrast and brightness) or define your own.
Colormap name: The standard colormaps are referred to with names (bone, gray, jet, rwb, etc).
Pick a different color set in the menu to update all the figures with similar data types.
Brightness: Moves the center of the color array up and down. Example values: -80, 0, +80.
The term "brightness" is not well adapted for rbw, jet or hsv. It makes more sense for colormaps with only one tint that varies in intensity, such as the gray colormap. We use it here for lack for a better word.
Contrast: Changes the distance between the first and last colors. Example values: -80,0,+80.
You can modify these values by clicking directly on the color bar. Hold the mouse button, then:
Move up/down to change the brightness,
Move left/right to change the contrast.
Custom color arrays
To edit your own list of colors, use the menu "New..." at the end of the list of standard colormaps.
Open a 2D sensor cap view for the MEG sensors for the standard average (Run#01).
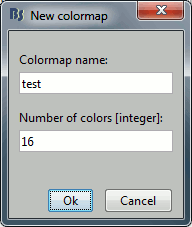
Right-click on the figure Colormap: MEG recordings > Colormap > New.Enter the name of the new colormap and the number of colors it will contain.
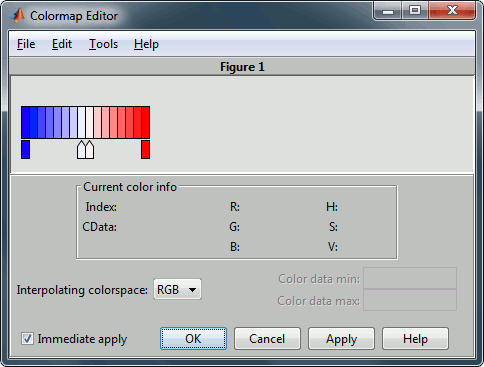
Each color in this color array is represented with a little square. The arrows in the the second row can be selected and deleted (delete key) or edited (double-click). They represent the key colors between which Matlab interpolates the other colors. Click on the second row to add more key colors.
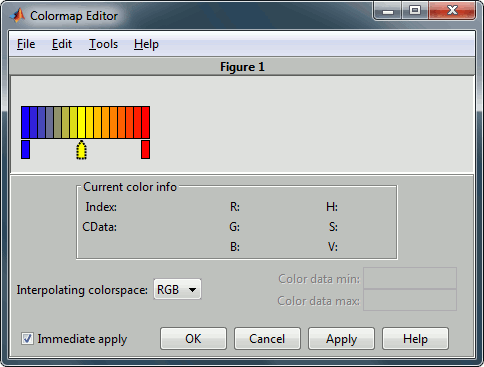
Once you are satisfied with your new colormap, click on [Ok].
It will update the figure. A new menu is now available in the list of colormap names.
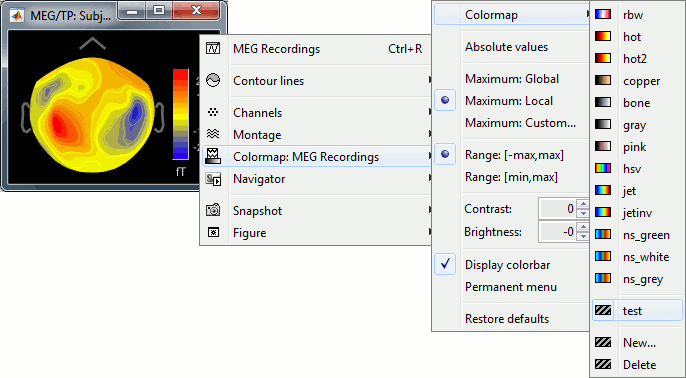
To delete the custom colormap currently selected, use the menu "Delete".
Color mapping
After defining the colors, we need to define how we want to map them with the values. The information necessary to do this color mapping is the value corresponding to the first and last colors. The color indices will be scaled linearly between these extrema.
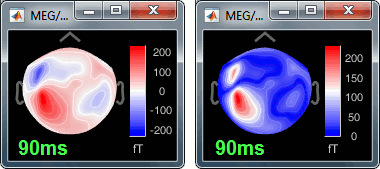
Absolute values: Display the absolute values of the recordings, instead of the original values. This has the effect of constraining the color mapping to positive values only. It is not very useful for exploring the recordings: in EEG and MEG, the sign of the values is very important.
Maximum: Method used to estimate the minimum and maximum values of the colorbar.
Global: The bounds of the colormap are set to the extrema values found in the entire file.
Example: if you use the rbw colormap and the min and max values are [-200ft, +200ft], the colors will be mapped in the following way: -200ft is blue, +200ft is red, 0ft is white. The mapping is identical for all the time samples. If you select this option at t=0ms, the 2D topography figure will turn almost white because the average values are low before the brain response.Local: Uses the local min and max values at the current time frame AND for each figure, instead of the global min and max. Example: A t=0ms, the extrema values are roughly [-30ft, +30ft]. So the colors will be mapped in order to have: -30ft=blue and +30ft=red.
Custom: You can manually set the min/max bounds of the colorbar. It does not have to be symmetrical around zero. If you set the values to [-40,+20] ft, the white colors would correspond to values around -10ft, and values around 0ft would be displayed in pale red.

You can usually keep the option Local when looking at recordings, it is easier to read.
But keep in mind that it is not because you see flashy colors that you necessarily have strong effects. It's always a matter of colormap configuration.
Range: Use symmetrical or non-symmetrical colormaps.
[-max, max]: Symmetrical colorbar around the absolute value of the maximum.
Example: at t=170ms, the range is [-220ft, +90ft], the color mapping used is [-220ft, +220ft].[min, max]: Uses the real min and max. Useful for displaying values that are not centered on zero. Example: at t=170ms, the mapping used is [-220ft, +90ft], white is not zero.
This option is ignored when the option "Maximum: Custom" is selected.

Colormap management
Remember that when you change any of the options above, it is saved in your user preferences. If you close Brainstorm and start it again, the colormap configuration stays the same.
To reset the colormap to its default values:
Double-click on the color bar, or
Use the menu Restore defaults.
Two additional menus can help you manipulate the colormaps:
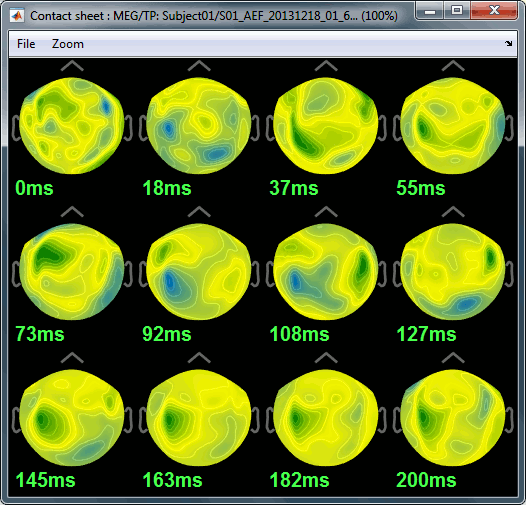
Display colorbar: In case you want to hide the color bar. Useful for contact sheets and movies.
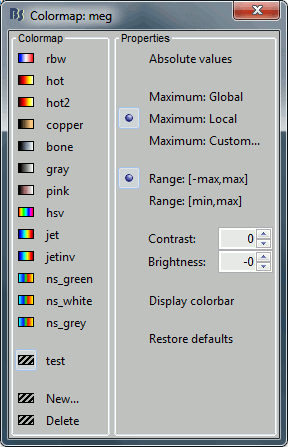
Permanent menu: Open a window that displays this colormap sub-menu, for faster access.
New default colormaps
Recently, the default colormaps of Brainstorm were changed because they lack important attributes of a good colormap: they don’t have linear lightness and they are not perceptually uniform. This can either cause details in the visualization to be hidden or create features that don’t exist in the underlying data, which results in a distortion of the perceived pattern. For that reason, new default colormaps were added to better represent the underlying data.
Here are the new colormaps created with their chosen names:
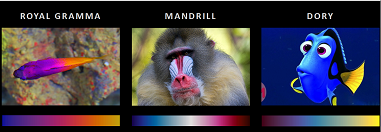
Three other colormaps were added: viridis and magma (taken from mpl colormaps) as well as a variation of viridis (viridis2). The colormaps were created using the viscm tool, which allows designing a colormap that has linear lightness and hue changes.
This paper presents the work done in more detail: colormap_optimization.pdf
JET Alternative
A new colormap created by Google, the Turbo colormap, was recently added. It is presented as a an improved rainbow colormap that can be used as an alternative to the popular JET colormap, resulting in a perceptually linear colormap.
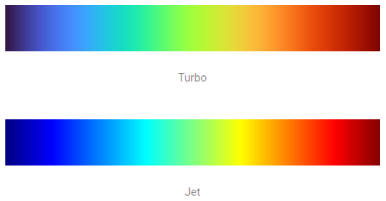
More information can be found on the following Google Blog post: https://ai.googleblog.com/2019/08/turbo-improved-rainbow-colormap-for.html

