|
Size: 14853
Comment:
|
Size: 14875
Comment:
|
| Deletions are marked like this. | Additions are marked like this. |
| Line 125: | Line 125: |
| 1. Click on '''Auto''' to automatically detect and label all the points correctly. Like any algorithm, this detection also might have bad detections. You can manually select and press '''Delete''' key to delete these points from the '''Coordinates''' list and the figure. Then in the point selection mode (press '''Ctrl+P''' while on the figure) click on the correct location on the mesh to remark them manually whick also updates the Coordinates list.<<BR>><<BR>> {{attachment:revogui12.png||width="600"}} | 1. Click on '''Auto''' to automatically detect and label all the points correctly. Like any algorithm, this detection also might have bad detections. You can manually select and press '''Delete''' key to delete these points from the '''Coordinates''' list and the figure. Then in the point selection mode (press '''Ctrl+P''' while on the figure) click on the correct location on the mesh and press key '''C''' to remark them manually which also updates the Coordinates list.<<BR>><<BR>> {{attachment:revogui12.png||width="600"}} |
Digitize EEG sensor locations and head shape using 3D Scanners (UNDER CONSTRUCTION)
Authors: Chinmay Chinara, Wayne Mead, Yash Shashanka Vakilna, Anand Joshi, Takfarinas Medani, Raymundo Cassani, John Mosher, Richard Leahy
Contents
Background
EEG allows the monitoring and recording of electrical brain activity from multiple electrodes placed on the scalp. EEG-based cortical current density mapping requires accurate knowledge of the locations of the electrodes on the scalp. The number and placement of electrodes vary from a few to high-density models with hundreds of electrodes. Researchers and clinicians have developed some solutions for precise electrode localization. The most common approach uses an electromagnetic digitizer (e.g. Polhemus). However, these methods are typically not easy to use, require skilled technicians, and the procedures are time-consuming and subject to errors.
This study presents Revopoint Range 2, an affordable and advanced 3D scanner that uses structured light approach for mapping the scalp surface (with the EEG cap on) and automatically identifying each electrode's 3D location and label.
NOTE: Jump to Digitize using Revopoint Digitize GUI in Brainstorm section if you already have a scanned mesh. That section also has an example mesh to try with.
The Hardware
Revopoint hardware package comes with the 3D Scanner with tripod and a USB to USB-C cable.
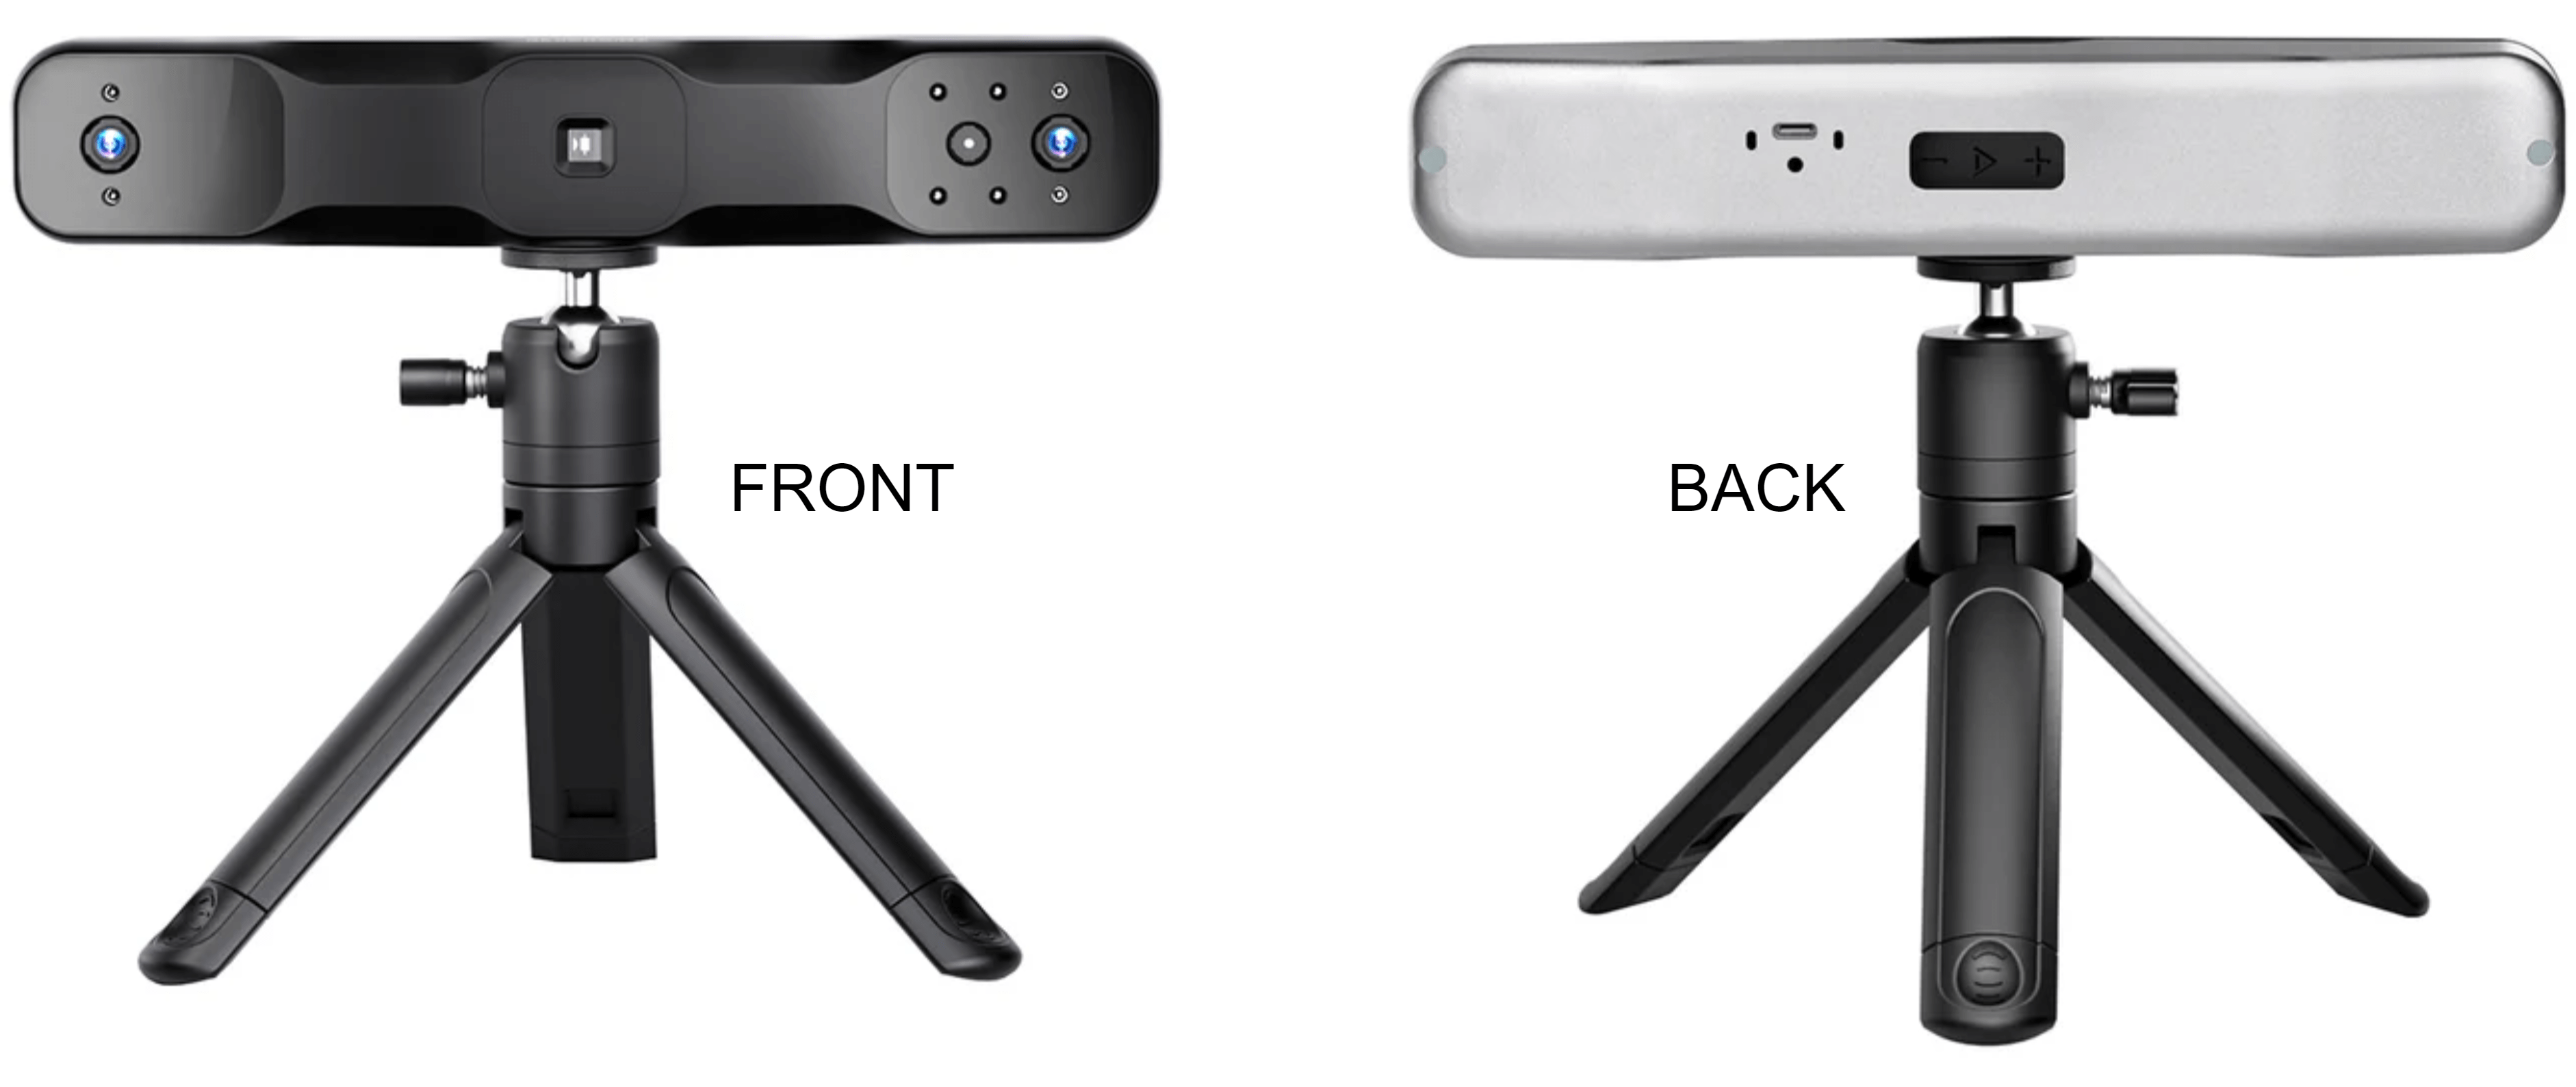
<TODO: more about the hardware>
System requirements
- Windows: Windows 10/11 (64-bit)
- RAM: 8 GB or better
- Processor: Intel Core i5 10th Generation or better
- Mac OS X: 10.7+
Prepare the EEG cap
- The EEG cap can be made of shiny materials and these can lead to bad scanning. To reduce the effect of shine make sure to spray it with any commercially available dry shampoo before each subject scan.
Prepare the subject
- Make sure the subject has no glasses on. Since the scanning involves use of flashing white light, the reflections from the glasses could lead to bad scanning.
- Minimize structures floating over the cap such as additional wires or hair. If the cap has removable electrodes with exposed wires, scan the cap without electrodes attached. A stocking over the cap can be used if exposed wires cannot be removed.
- While the scanning is on, make sure the subject sits as steady as possible and has his eyes closed.
Revo Scan software
Revopoint uses the Revo Scan software to do the scanning of a subject wearing EEG cap and generate a 3D mesh. This mesh can then be imported into Brainstorm to automatically detect and label the electrodes in it.
Installation
Download the software from their webpage based on your Operating System (OS).
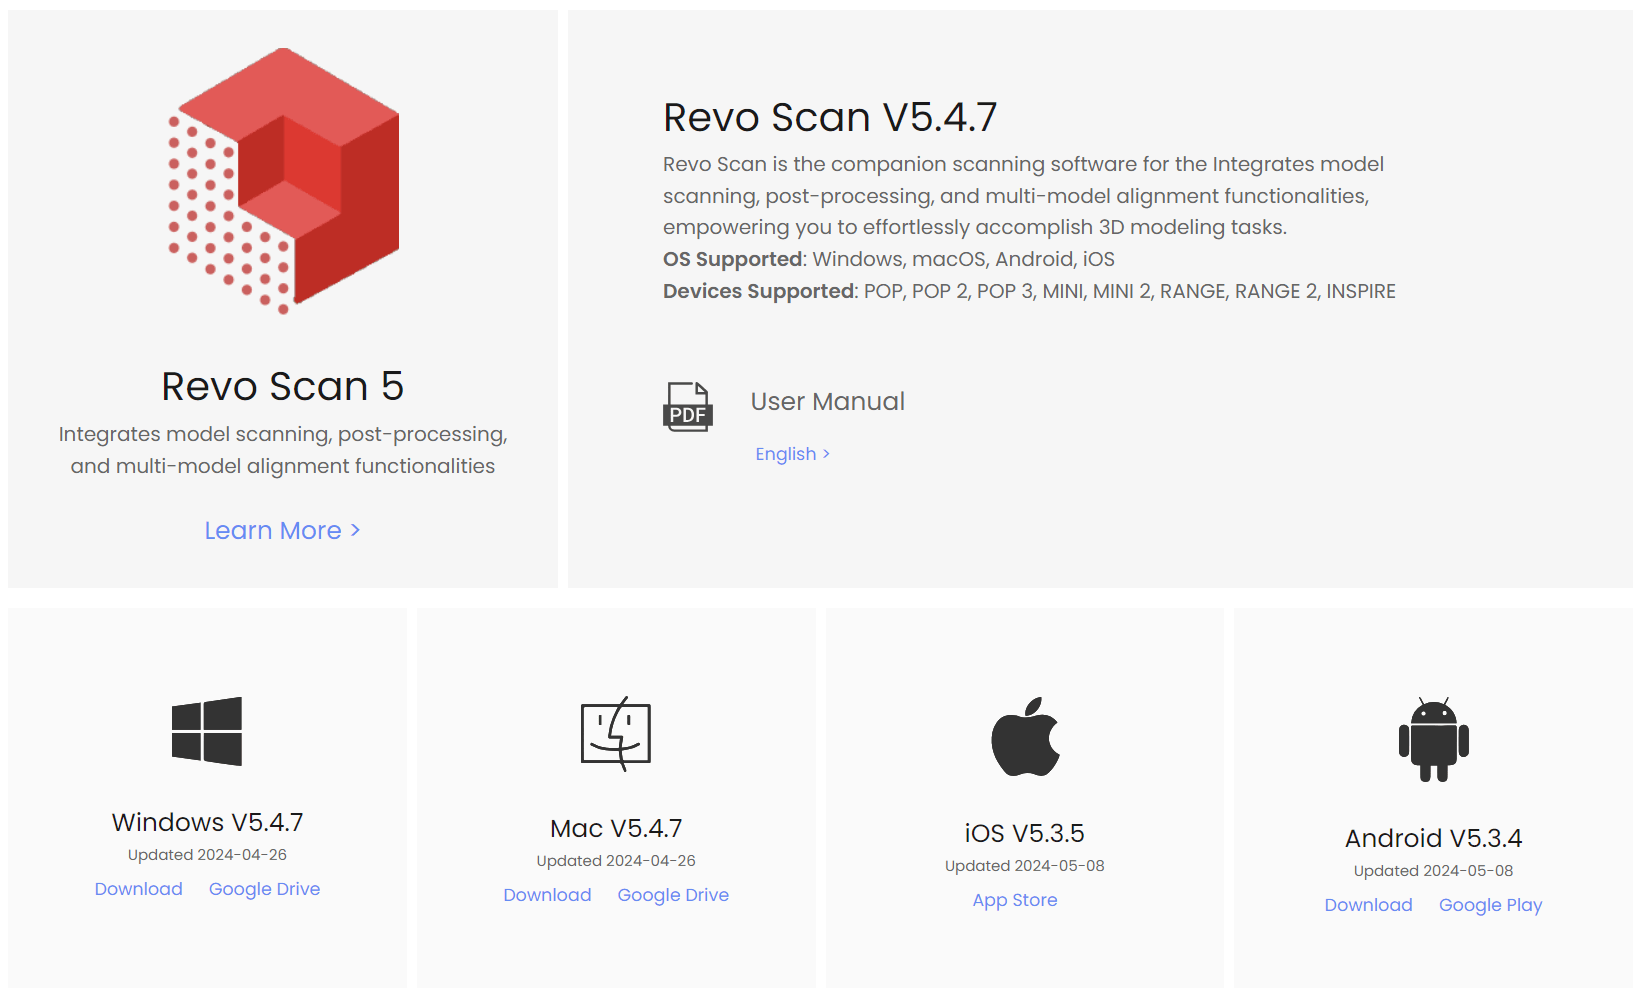
Install it by keeping the defaults. After it has finished installing click on Complete.
![[ATTACH] [ATTACH]](/moin_static1911/brainstorm1/img/attach.png)
Start new project
Connect the 3D scanner to your PC and launch the RevoScan software. It will take few seconds to initialize and show Scanner Connected as under.
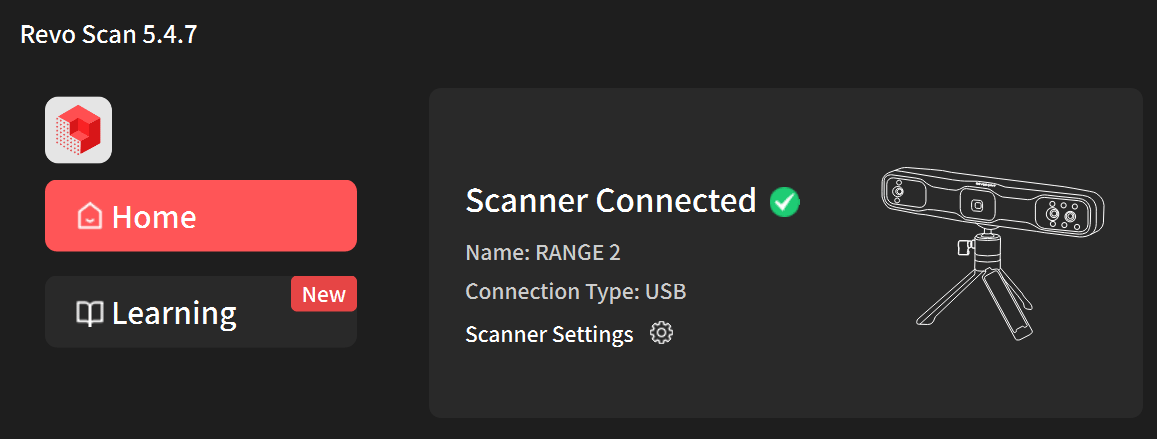
- If you are connecting it for the first time, it might ask for calibration of the device which is a very essential step. Calibrating a Revopoint 3D scanner resets its internal parameters to ensure accurate scanning data and alignment. Follow the onscreen steps and prompts to complete the calibration.
Click on New Project and give it a File Name and Location. Click New. Make sure to start a new project per subject.
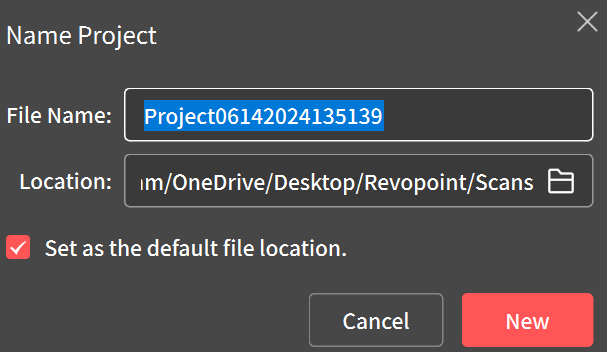
This should now take you to the scanning window.
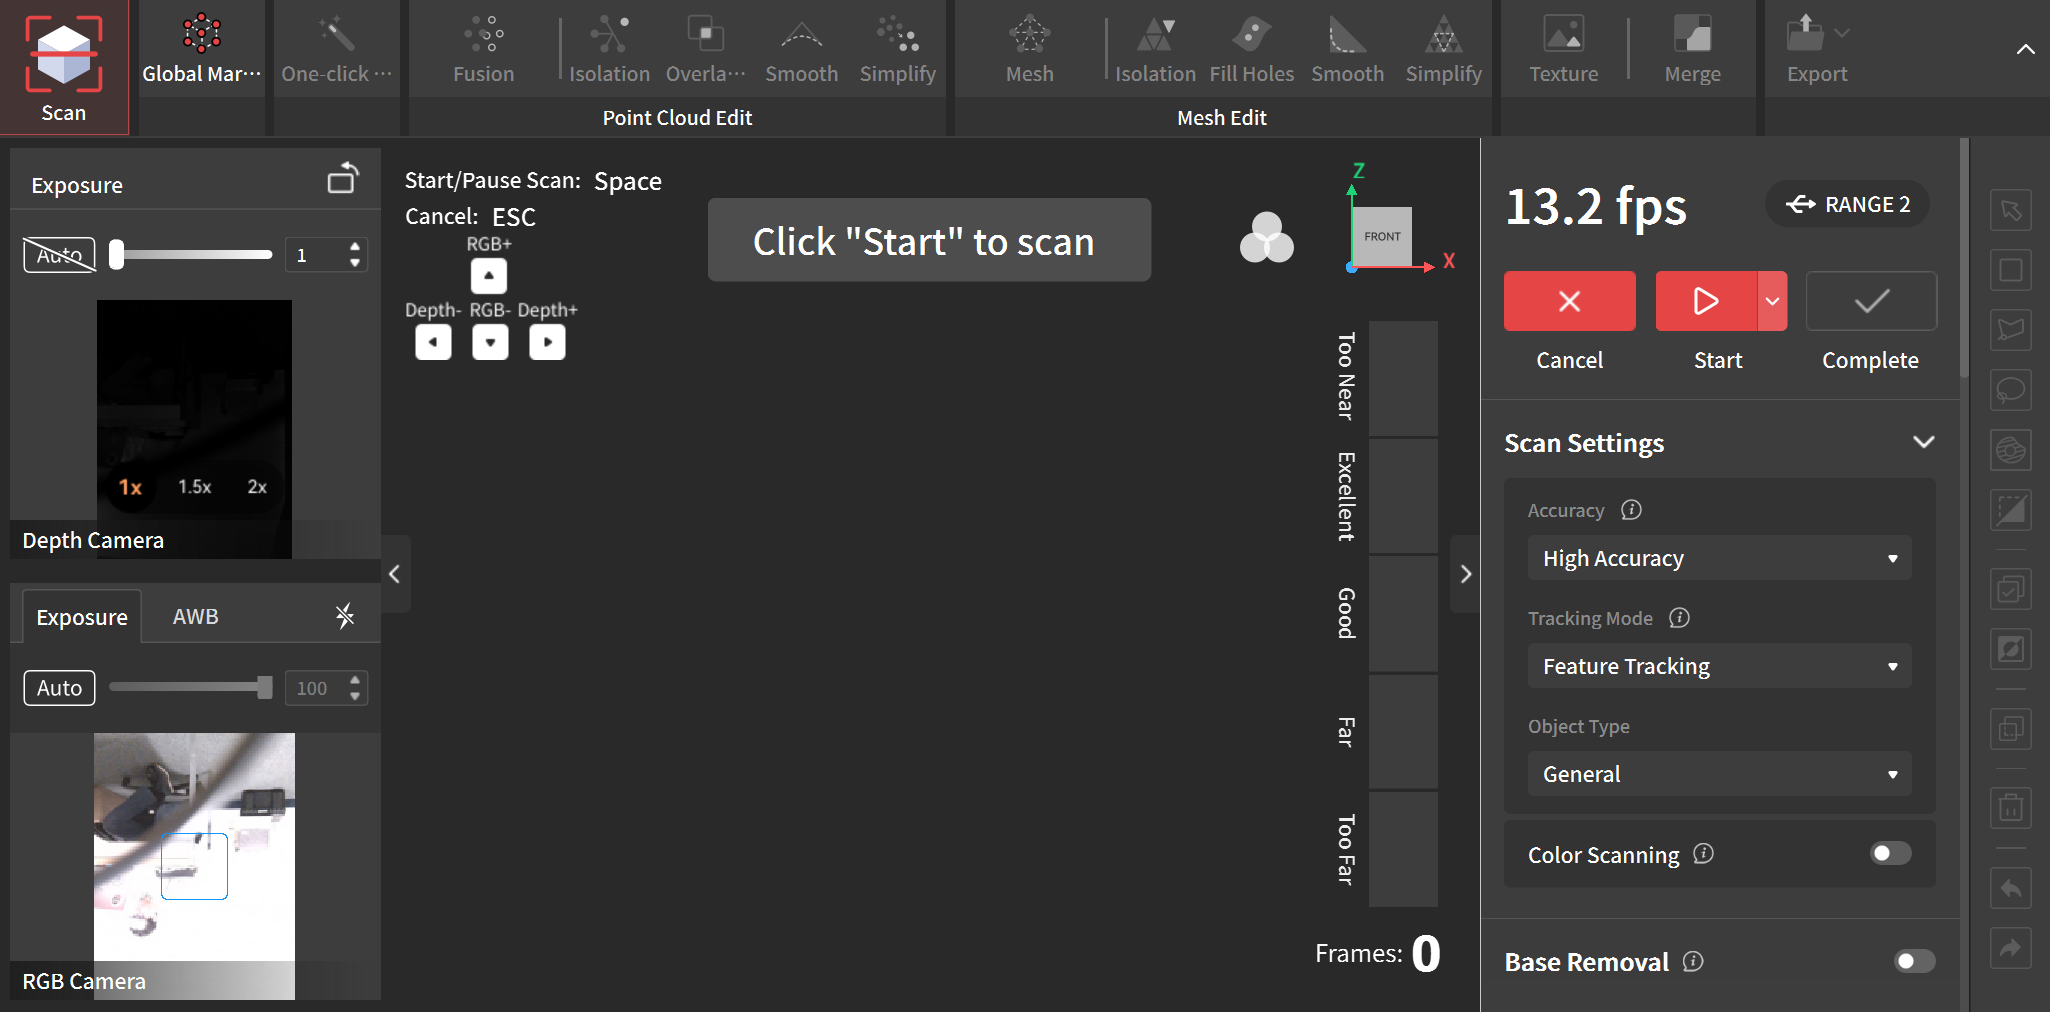
Pre-scanning setup (Scan Mode)
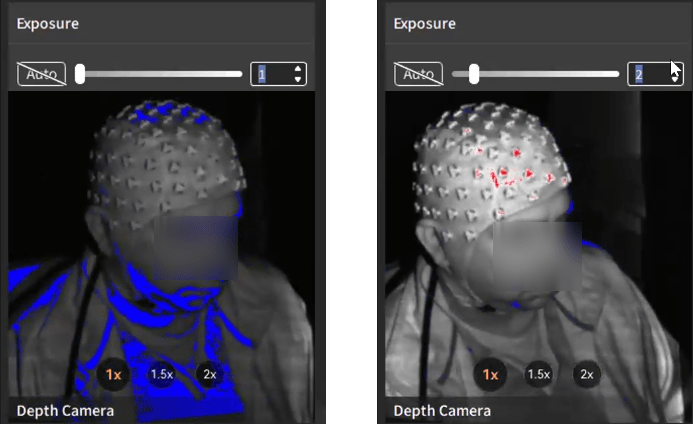
Depth Camera exposure (top left section): Use the plus/minus buttons behind the scanner to increase/decrease the exposure. Blue/Red artefacts in this window indicate under/over exposed camera. Use the buttons to adjust the exposure so that there are minimal/no artefacts. For e.g. in the scan below, the exposure of 1 was gave underexposed artefacts and increasing it to 2 gave good results. This exposure depends largely on the environment your scanning is done in and can vary from case to case.
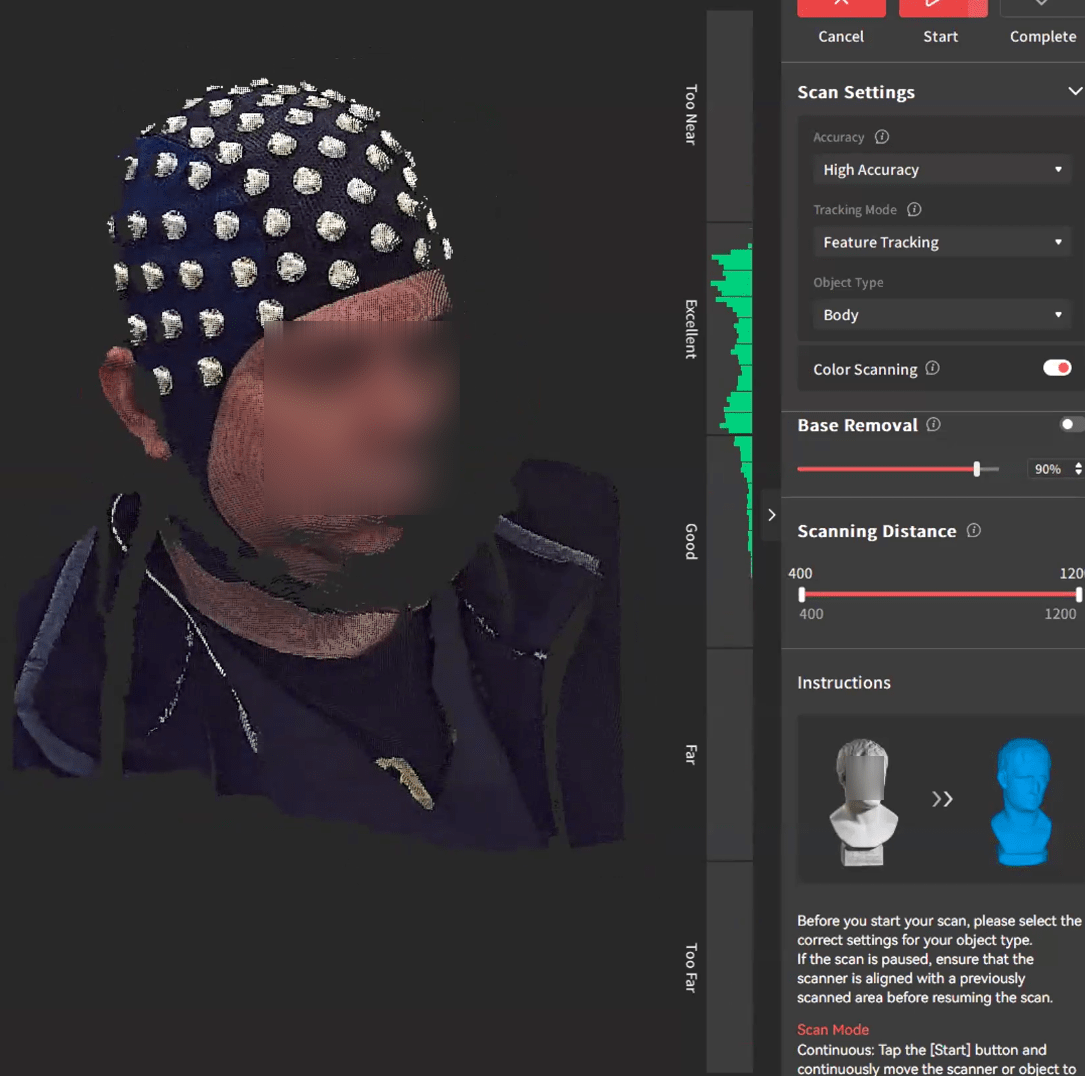
Scan Settings (right section):
- Accuracy: High Accuracy
- Tracking Mode: Feature Tracking
- Object Type: Body
- Color Scanning: On
- Base Removal: Default (90%)
Scanning Distance: ~ 400 mm to 900 mm

Get a good scanning distance: Pointing the camera to the subject, move close and away from them. You can see the range meter on the right just to the left of the Scan Settings going from Too Near to Too Far. You want to be in the Excellent range to get the best results. Note/mark this distance.
Scanning
From the marked position above, click on the Play button on the back of the Revopoint to start the scanning. Move the camera continuously with a steady hand, balance speed and stability to improve the quality of your scans. Most scans for the entire head can be accomplished in 30 seconds. The green color on the scanning mesh being generated indicate that the scan is going correctly and in Excellent range. If otherwise, then pause the scanning at that instant by pressing the Play button again. There are 2 things that can be done from here:
If you want to resume over the same scan, pressing Play again will resume the scan and automatically start aligning to the already generated scan. This is not recommended as the result might contain a lot of over scanning artefacts.
The other option is to click on Complete and start a new scan and then later you can choose to merge multiple scans together. This is recommended as this reduces the creation of artefacts.
Processing (Basic)
This section covers the minimal editing steps required to export the generated mesh.
Processing (Advanced)
This section covers advanced editing steps on the mesh before exporting it.
Saving and exporting
Digitize using Revopoint Digitize GUI in Brainstorm
Example dataset
The example dataset can be downloaded from here.
sub1/
sub1_mesh_tex.obj: The obj mesh file.
sub1_mesh_tex.jpg: The texture file associated with the mesh.
sub1_mesh_tex.mtl: The material file associated with the mesh.
- The mesh has been defaced.
Loading the mesh
If running from source code, make sure you have MATLAB R2016b or higher. We recommend having MATLAB R2018b or higher for best performance.
Create a new protocol called Tutorial_Digitizer.
Enter the Subject ID in the pop-up window that opens up. Make sure that it is unique and does not match to any other subject in the same protocol. We will call it sub1.
![[ATTACH] [ATTACH]](/moin_static1911/brainstorm1/img/attach.png)
The subject gets created with the Default Anatomy.
From the Import surfaces... window, do the following:
The mesh gets loaded into the protocol for the subject and the Digitize GUI opens up along with the mesh loaded. The Brainstorm GUI will be hidden during the use of the application and will reappear after exiting Digitize GUI.
![[ATTACH] [ATTACH]](/moin_static1911/brainstorm1/img/attach.png)
- This application allows you to collect:
- Three head localization coils (HPI) for computing the head coordinate system
- Three anatomical landmarks for MEG/MRI co-registration
- EEG sensor locations
- Scalp points for head shape
- When complete the coordinates can be save in a variety of formats including CTF (*.pos), megDraw (*.eeg) or tab-delimited ASCII text.
Configure EEG cap point collection
Go to File>Edit Settings.... This opens up the 3DScanner configuration window.
![[ATTACH] [ATTACH]](/moin_static1911/brainstorm1/img/attach.png)
Digitize MEG HPI coils: This will allow for collection of the positions of the HPI coils. This is important for CTF users since the data collected from the MEG system is saved in HPI coil coordinate system. Users collecting only EEG sensors or just head shape will not collect these points. For this example, we set it to 0.
Number of times to collect the three fiducials: These collections will occur at the beginning of the session and will be averaged together to compute the transformation to the HPI or head coordinate system. For this example, we set it to 1.
Beep: This will generate a beep sound with each point collection (this is often helpful to realize a click while collecting a point from the mesh). For this example, we set it to 1.
Configure EEG montage
The next step is to configure EEG montage to select the cap layout we want to select. Brainstorm by default has a bunch of cap layouts already predefined. For this example, the ANT Waveguard original 64-channel cap was modified to 65 channel and used.
![[ATTACH] [ATTACH]](/moin_static1911/brainstorm1/img/attach.png)
Go to EEG montage>Add EEG Montage...>Use default EEG cap>Colin27>ANT>ANT Waveguard 65 to add load the layout to the Coordinates section where the collected points will also be updated.
![[ATTACH] [ATTACH]](/moin_static1911/brainstorm1/img/attach.png)
Collect the required number of Anatomical Fiducials
Click on the mesh, and press Ctrl+P to activate collection mode (you will see the mouse cursor change to a crosshair). Click on the desired location on the mesh and press key 'C' to collect the NPA, LPA and RPA fiducials in order. The change can be seen in the Coordinates panel under each label.
When collecting more than one set of fiducials, an error message is displayed if the difference between the sets is > 5mm
- If the MEG HPI coils are not used, then the head coordinate system is computed with the anatomical fiducials and the points are plotted on the 3D point display. Unless the user changes the anatomy for the brainstorm Digitize subject, the default anatomy is used. It may not match exactly the subject being digitized, but should be a good quality control image to ensure the points are positioned where expected.
- Note that the 3D figure is a standard Brainstorm window, where you can use all the mouse operations (rotation, zoom, popup menu) and the keyboard shortcuts (predefined view, screen capture...) introduced in the previous tutorials.
- The coordinates are displayed in the coordinate list in cm
- The points are saved in the brainstorm channel file as CARDINAL Head Points
The collection automatically moves to EEG (if desired) or head shape
![[ATTACH] [ATTACH]](/moin_static1911/brainstorm1/img/attach.png)
Collect the required number of EEG points
- Make sure collection mode is active (crosshair visible as per Step-1 in the previous section).
We are going to automatically detect and label the electrodes in the cap, but for that we need a minimal set of manual points that will help detect the rest of the electrodes. For this example, we are going to manually collect Oz, T8, Fpz, T7 in order from the mesh based on the layout above. The 4 figures below (top to bottom) correspond to the order Oz, T8, Fpz, T7 respectively.
![[ATTACH] [ATTACH]](/moin_static1911/brainstorm1/img/attach.png)
![[ATTACH] [ATTACH]](/moin_static1911/brainstorm1/img/attach.png)
![[ATTACH] [ATTACH]](/moin_static1911/brainstorm1/img/attach.png)
![[ATTACH] [ATTACH]](/moin_static1911/brainstorm1/img/attach.png)
Click on Auto to automatically detect and label all the points correctly. Like any algorithm, this detection also might have bad detections. You can manually select and press Delete key to delete these points from the Coordinates list and the figure. Then in the point selection mode (press Ctrl+P while on the figure) click on the correct location on the mesh and press key C to remark them manually which also updates the Coordinates list.
![[ATTACH] [ATTACH]](/moin_static1911/brainstorm1/img/attach.png)
Collect the desired number of head shape points
- In order to take full advantage of the MEG/MRI co-registration algorithms in Brainstorm, it is recommended to collect approximately 100-150 points from the head: 5-10 points from the boney part of the nose, 10-15 points across the eyebrows, then an even coverage of the scalp from the eyebrows to the inion. It is NOT recommended to collect points below the inion on the neck, since the shape of the neck can change between lying in the MRI scanner and sitting during point collection. Even coverage is more important that dense coverage.
To automatically choose 100 random points, click on Random. These can be seen as the green points in the figure and the numbered 001-100 in the Coordinates list on the GUI.
![[ATTACH] [ATTACH]](/moin_static1911/brainstorm1/img/attach.png)
- Each point is displayed on the 3D points display
- The counter is incremented each time a point is collected and therefore indicates which point will to be collected next
- The coordinates are displayed in the coordinate list in cm
- The points are saved in the brainstorm channel file as EXTRA Head Points
- Once complete, the operator can save the points to a text file in a variety of formats.
Save
The points can be saved as a POS file for import into CTF datasets or your Brainstorm database. Select Save as... and confirm the file name and location.
When exiting the program, select File > Save and Exit to ensure the points are saved in the Brainstorm database.
