|
Size: 1968
Comment:
|
Size: 2970
Comment:
|
| Deletions are marked like this. | Additions are marked like this. |
| Line 17: | Line 17: |
| * Name it "TutorialNeuromag", and select all the options as illustrated: No default anatomy, Use inidividual anatomy, Use one channel file per condition.<<BR>><<BR>> {{attachment:createProtocol.gif}} | * Name it "!TutorialNeuromag", and select all the options as illustrated: No default anatomy, Use inidividual anatomy, Use one channel file per condition.<<BR>><<BR>> {{attachment:createProtocol.gif}} |
| Line 20: | Line 20: |
| * Select the "Anatomy" exploration mode (first button in the toolbar above the database explorer). * Right-click on the protocol node and select "New subject".<<BR>><<BR>> {{attachment:createSubjectMenu.gif}} * You can leave the default name "Subject01" and the default options. Then click on Save.<<BR>><<BR>> {{attachment:createSubject.gif}} * Right-click on the subject node, and select "Import MRI". Select the file: sample_mind_neuromag/anatomy/T1.mri<<BR>><<BR>> {{attachment:mriImportMenu.gif}} {{attachment:mriFile.gif}} * The orientation of the MRI is already ok, you just have to mark all the six fiducial points, as explained in the following wiki page: [[CoordinateSystems|Coordinate systems]]. Click on save button when you're done.<<BR>><<BR>> {{attachment:fiducials.gif}} * Right-click again on the subject node, and select "Import surfaces". Select all the surfaces at once, holding the SHIFT or CTRL buttons, and click on Open.<<BR>><<BR>> {{attachment:surfaceFiles.gif}} |
Import and process Neuromag raw recordings
This tutorial describes how to process raw Neuromag recordings. It is based on median nerve stimulation acquired at MGH in 2005.
This document shows what to do step by step, but does not really explain what is happening, the meaning of the different options or processes, the issues or bugs you can encounter, and does not provide an exhaustive description of the software features. Those topics are introduced in the basic tutorials based on CTF recordings; so make sure that you followed all those initial tutorials before going through this one.
The script file tutorial_mind_neuromag.m in the brainstorm3/toolbox/script folder performs exactly the same tasks automatically, without any user interaction. Please have a look at this file if you plan to write scripts to process recordings in .fif format.
Download and installation
- It is considered that you followed all the basic tutorials and that you already have a fully working copy of Brainstorm installed on your computer.
Go to the Download page of this website, and dowload the file "bst_sample_mind_neuromag.zip".
- Unzip it in a folder that is not in any of the Brainstorm folders (program folder or database folder). This is really important that you always keep your original data files in a separate folder: the program folder can be deleted when updating the software, and the contents of the database folder is supposed to be manipulated only by the program itself.
- Start Brainstorm (Matlab scripts or stand-alone version)
- In the protocols drop-down list, select the menu "Create new protocol".
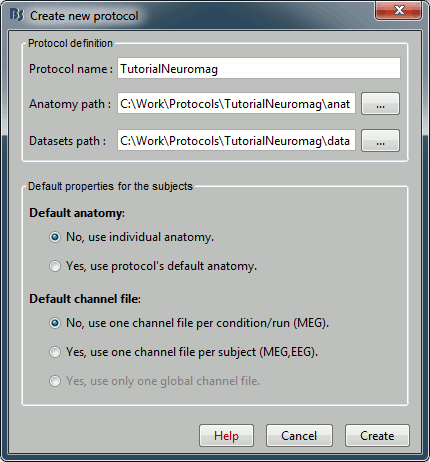
Name it "TutorialNeuromag", and select all the options as illustrated: No default anatomy, Use inidividual anatomy, Use one channel file per condition.
Import anatomy
- Select the "Anatomy" exploration mode (first button in the toolbar above the database explorer).
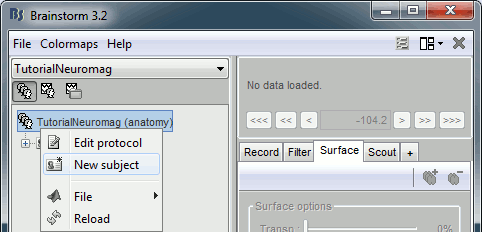
Right-click on the protocol node and select "New subject".
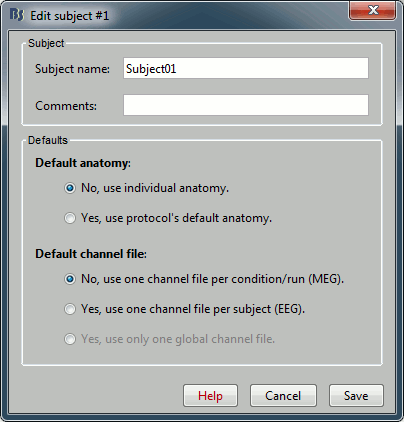
You can leave the default name "Subject01" and the default options. Then click on Save.
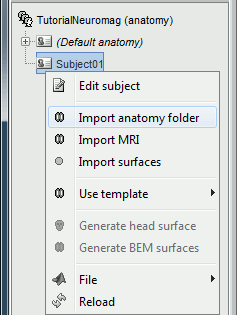
Right-click on the subject node, and select "Import MRI". Select the file: sample_mind_neuromag/anatomy/T1.mri
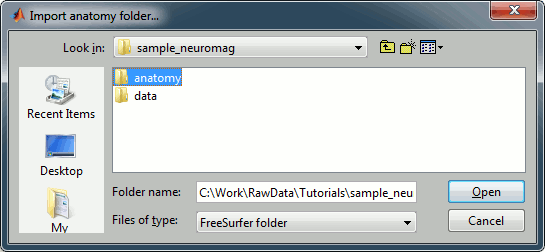
The orientation of the MRI is already ok, you just have to mark all the six fiducial points, as explained in the following wiki page: Coordinate systems. Click on save button when you're done.
![[ATTACH] [ATTACH]](/moin_static1911/brainstorm1/img/attach.png)
Right-click again on the subject node, and select "Import surfaces". Select all the surfaces at once, holding the SHIFT or CTRL buttons, and click on Open.
![[ATTACH] [ATTACH]](/moin_static1911/brainstorm1/img/attach.png)
